Maps in LINKPlanner
There are potentially three types of map available, depending on the operating system and Internet access.
Offline Map - available on all platforms
Google Maps - available on Windows providing that there is Internet access
Google Earth - available on Windows providing that there is Internet access
The maps can be enabled/disabled through the View menu.
To easily find a site or link on the map, right-click on the item in the project navigation tree and select Show in Map from the pop-up menu.
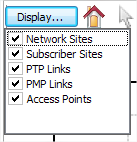
In the Map panel click the Display Icon on the Map toolbar, select the objects to be displayed on the map, all objects are displayed by default.
Offline Map
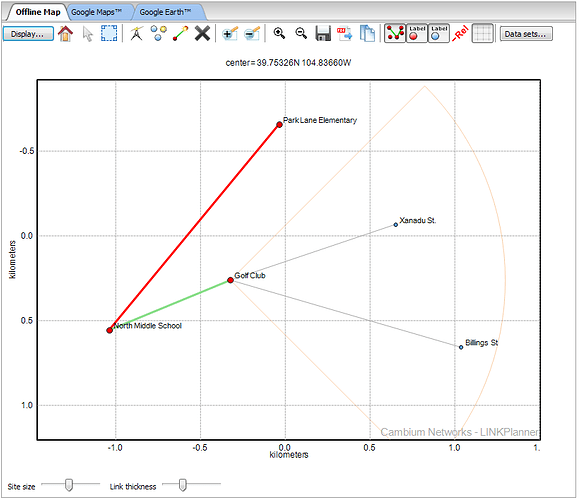
The Offline Map is a schematic plan of the sites and links that have been entered in the project. The Offline Map supports many editing features that are also available on other panels, but may be faster or easier to apply when viewing the map and surrounding sites.
The size of the links and sites can be controlled using the sliders below the map. A circle is used as the default site marker. To change the marker shape, right-click on the intended site and click Properties from the pop-up menu. The Site Properties Dialog can then be used to alter the shape or to set a custom icon.
Note: Custom Icons are not displayed in reports or PDF exports also the Icon appearance may vary depending on the operating system.

The site labels can also be repositioned if necessary. Click and drag the label to the required location. To reset the label, drag it over the site marker.
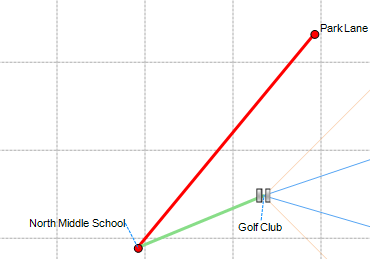
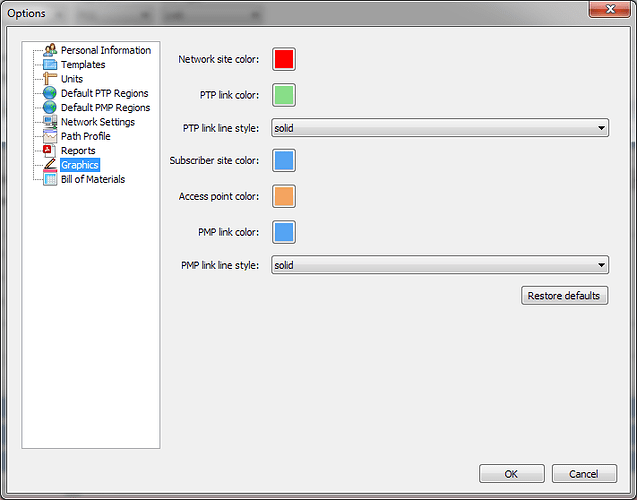
By default, link lines are colored to indicate whether or not their predicted performance meets requirements: red means performance is not acceptable, green means performance is acceptable. It is possible to alter the default colours of links, AP, site and other elements from Graphics page by clicking on Tools > Options > Graphics.
Additional formatting settings can be applied to PTP links using Link Formatting Rules (read more at http://community.cambiumnetworks.com/t5/LINKPlanner-FAQ/How-to-customize-PTP-links-using-Link-Formatting-Rules/m-p/38979#U38979 )
Offline map icons
The offline map panel has icons to access many functions.
|
Icon |
Description |
| |
Select area on the map |
| |
Zoom in rectangle |
| |
Zoom out rectangle |
| |
Zoom in around the centre of the map |
| |
Zoom out around the centre of the map |
| |
Save the map to an image or PDF |
| |
Copy the map to clipboard |
| |
Display the reason for the error in labels on links |
| |
Display the background grid |
| |
Plot datasets on the map ( at present only the FCC weather radar sites are available) |
Note: Icon appearance may depend on operating system, above is taken from a Windows system.
Map Pop-Up Menu
The Offline Pop-Up Menu can be used to access many functions, depending on the item selected. To display the menu, right-click on an item in the Offline Map. When running on a Mac, right-click may not be enabled, in which case hold down the control key whilst left-clicking on the item to display the menu.
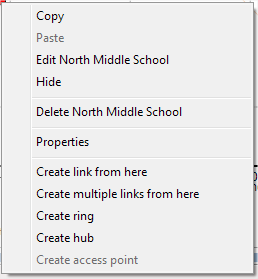
|
Menu |
Description |
|
Copy |
Copy the selected item |
|
Paste |
Paste an item that has been copied |
|
Duplicate |
Duplicate a PTP link |
|
Edit |
Edit the item in a tear-off panel |
|
Hide |
Hide the item from the map view |
|
Delete |
Delete the item from the project |
|
Change Sites |
Change the link to connect two different sites |
|
Properties |
Access the properties dialog |
|
Create link from here |
Create a PTP link from the selected network site |
|
Create multiple links from here |
Create multiple PTP links from the selected network site |
|
Create ring |
Create a ring of links between consecutive network sites |
|
Create hub |
Create a hub from a network site, only one hub can be created per network site |
|
Create Access Point |
Create an Access Point on a hub (only available if the selected item is a hub site), multiple Access Points can be created on the same hub. |
|
Attach subscribers |
Attach subscribers to the selected Access Point (only available from an Access Point coverage area) |
Map Selection Area
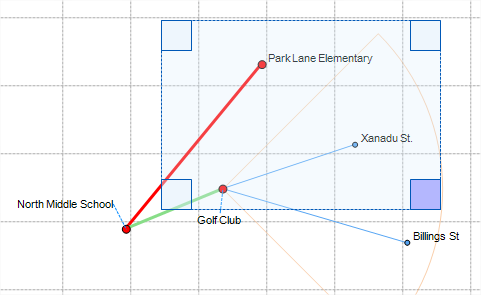
To define an area on the map, select the selection window icon ![]() and draw an area on the map. To increase or decrease the size of the area, select one of the corners and drag to re-size. When the selection covers the items required, right-click to access the following menu options.
and draw an area on the map. To increase or decrease the size of the area, select one of the corners and drag to re-size. When the selection covers the items required, right-click to access the following menu options.
- Copy
- Hide
- Show
- Delete
Items will only be hidden or shown if they are entirely covered by the selection window, e.g. both ends of the link must be within the selection window to hide a link.
To show all hidden items, select View, Show All from the main toolbar.
