Overview
The Installer app allows installers to onboard Enterprise Wi-Fi APs and cnMatrix switches to cnMaestro without directly accessing the cnMaestro interface. This simplifies the onboarding process, especially for installers who do not have admin access to cnMaestro.
Prerequisites
Before creating an Installer app, the MSP admin must:
- Create Enterprise Sites
- Create AP Groups and Switch Groups in the Managed Account
Step 1: Create Installer App
-
Navigate to Network Services > MarketApps.
-
Click “Add New”.
-
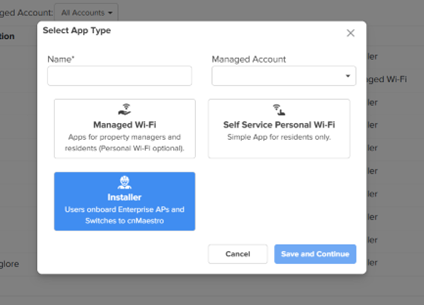
Enter a name for the app and select the Managed Account under which the app should be created.
-
Choose Installer, then click Save and Continue.
Step 2: Configure installer app
-
Once the app is created, go to the Settings tab.
-
Select a Site from the dropdown. [One site linked to one app only]
-
(Optional) Enable and select up to 5 AP Groups/Switch Groups to assign during provisioning.
-
In the Invite Installer section, enter the email IDs of the installers (up to 10).

In the Design tab, configure the following:
-
Display Name (Name will be used in email communication and displayed to the installer.)
-
Service Provider Name (The name of the entity providing the service.)
-
Logo for branding
-
Theme Color to highlight text
(Optional) Add URLs for:- Privacy Policy
-
Terms & Conditions (will be shown on first access)
-
Powered By details for branding
Click Save to apply changes.

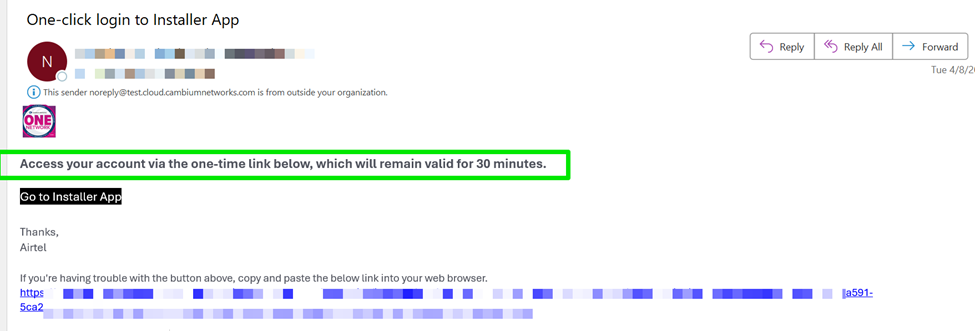
Steps 3: Invitation Email
Installers will receive an invitation email with a link to access the Installer web page.
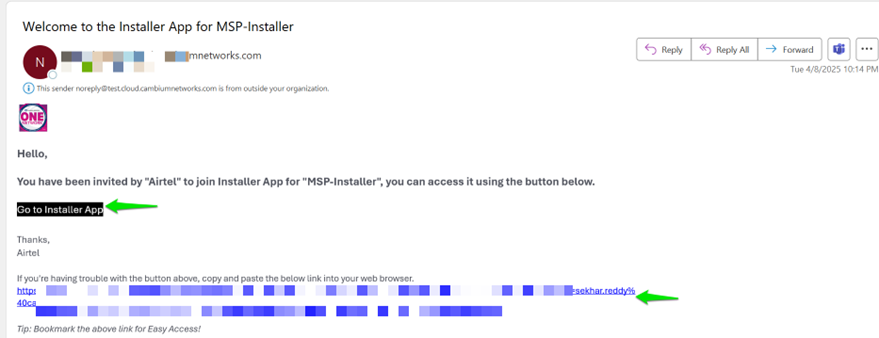
Tip: Bookmark the link for easy future access.
- After clicking the email link, installers can request a one-time authentication link.
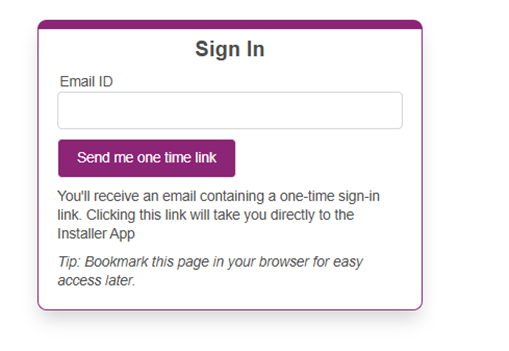
Again, Installers will receive one time link which will be valid for 30 mins
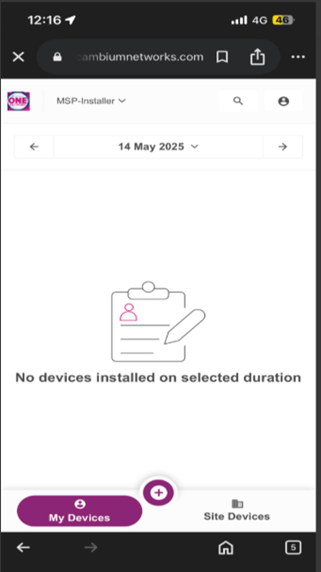
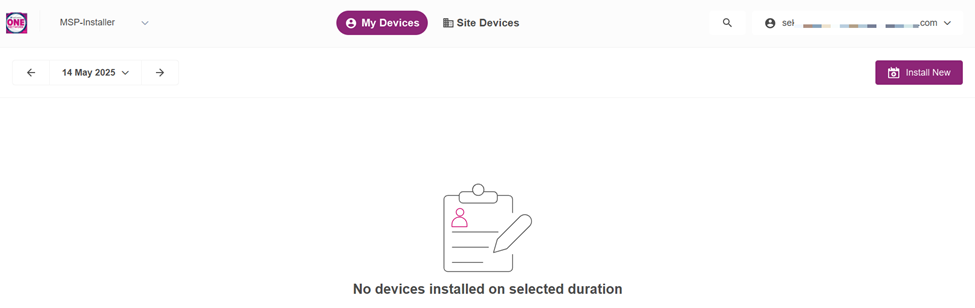
Step 4: Access the Installer Web App
o Upon clicking the one-time link, the installer will be directed to the installer web app.
o The web app supports both mobile and desktop views.
**Mobile view**
**Web page view**
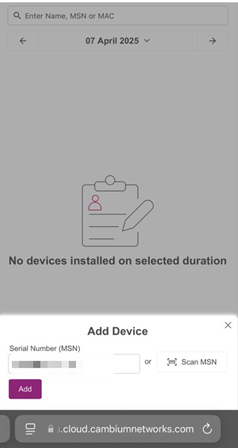
Step 5: Claim a Device
Click “Install New” (visible on desktop) or tap the ![]() icon (on mobile).
icon (on mobile).
Enter the device serial number or scan MSN. (If the scanner is unable to scan the QR code, enter the serial number manually)
Verify the serial number and click “Add” to proceed. (If the device is already claimed in another cnMaestro account, an error will occur during installation.)
Steps 6: Enter Details
- Enter the hostname.
- Select the AP Group or Switch Group from the dropdown.
- Enter the location details and other required information.
- The installer can attach device photos showing where the device is located.

Step 7: Complete Onboarding
- Review all entered information.
- Click Submit to complete the onboarding process.
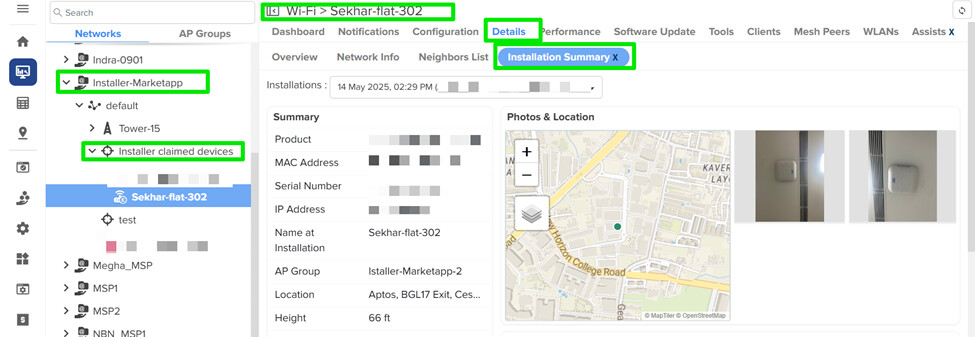
- View the details in installation summary and check ethernet speed in link status section
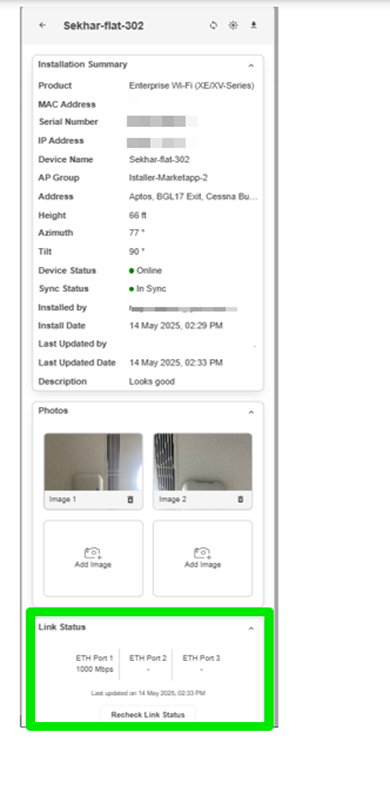
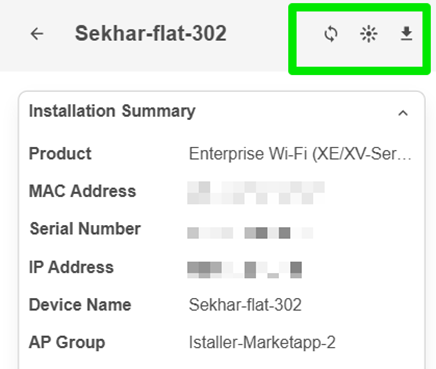
- Once a device is installed, the Device Summary page provides options to Refresh, Flash LED and Download Report.
Installer app Features
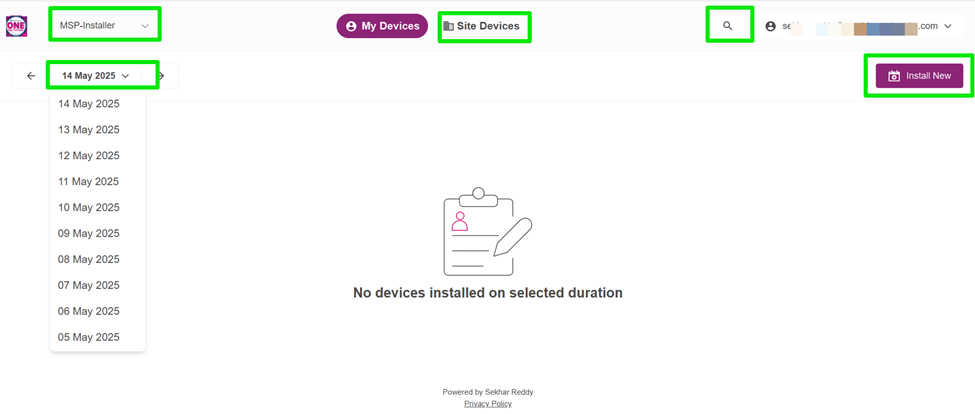
• Installers can select an app from the drop-down menu (applicable if they are part of multiple sites).
• Installers can view the installation history for the past 10 days.
• If multiple devices were installed in the last 10 days, installers can search by Name, MSN, or MAC address to view device details.
• Installers can also view installations done by other installers on the same site, check the Ethernet speed, and update the comments if needed.
• Installer access remains active until the MSP admin removes it or deletes the account.
Expected Outcome
- MSP admin can view the installation summary in following places
- Network Services > Installation Summary
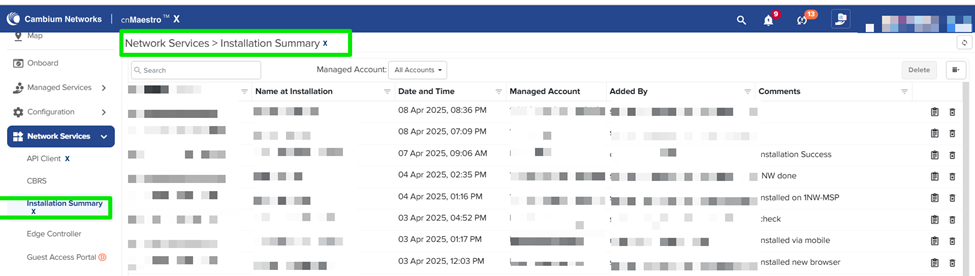
- Once Device claimed the device will appear in selected site in cnMaestro account.
- The device will inherit configurations from the assigned group.
- Users can monitor and manage the device through cnMaestro.
- Navigate to system->Managed account → Site → device ->details → Installation summary.