This article explains how we can replace a PoP Node running Onboard E2E Controller from cnMaestro with a backup.
Warning!!!
- This process will involve outage to the network so should be planned as needed.
- Failing to carefully read the full document and take care the pre-requisites may result in a failed E2E restoration and possibly a long outage window.
NOTE: This feature is applicable only if the PoP Node enabled as Onboard E2E External controller and running 1.2.2 Software image version or higher.
What is not recommended?
“Replace Node” cnMaestro function that is shown in the screenshot below should NOT be used for this type of use-case
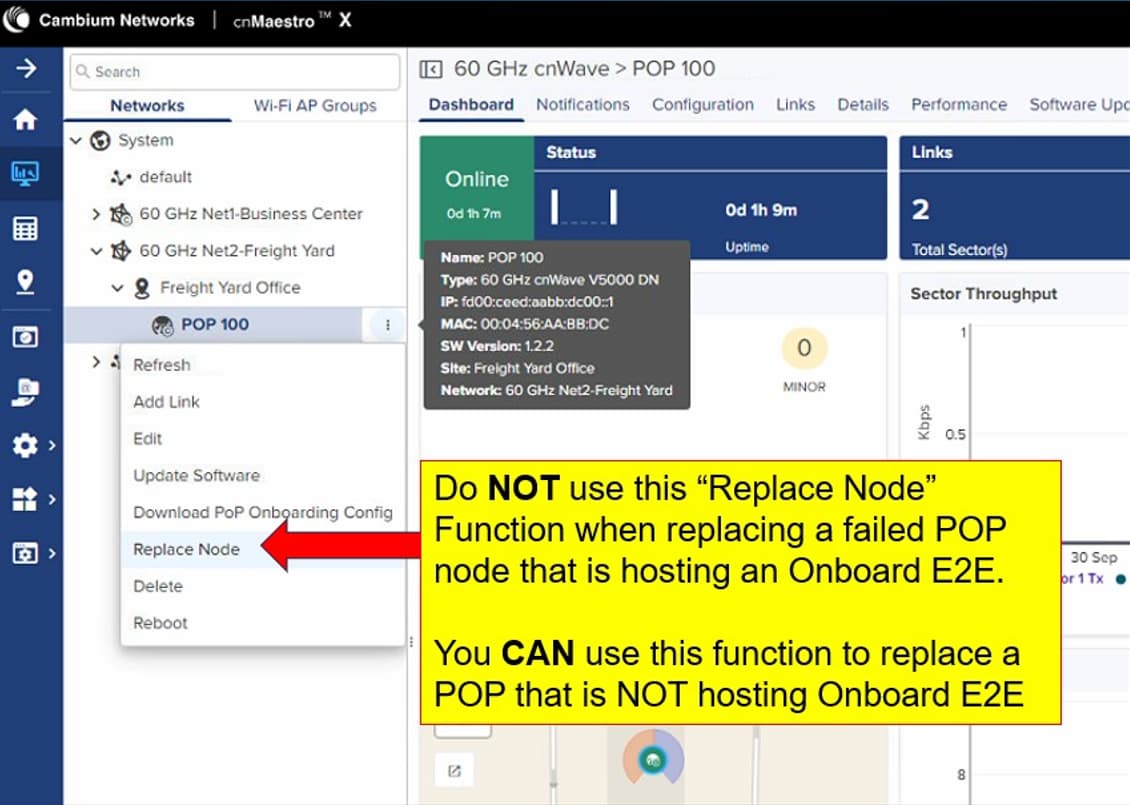
Note: Although, since an Onboard E2E can support Multi-POP, the “Replace Node” function should be available for a POP that is NOT hosting an Onboard E2E
What is needed?
- The network should have been connected to cnMaestro and must be online.
- A spare radio node (of exact same Model … V5000, V3000, etc.) as failed PoP node and that should not be an alternate node from the same network topology.
- The spare node must be running same or higher image version as the current PoP node.
How long should this take?
Approximately 5 to 10 mins after the backup has been successfully restored.
Begin with complete replacement steps:
-
It is required to take a new backup of the current E2E Controller Network from cnMaestro. We can download the backup by clicking on Monitor and Manage → Network → Tools → Operations → Backup option in Browser in cnMaestro.
-
Once it is determined that the original POP node that is currently hosting an Onboard E2E Controller needs to be replaced, a spare radio node (of exact same Model … V5000, V3000, etc.) needs to be obtained by the local installers and the MAC address and Serial number noted. Local installer physically place the new spare node at the same place of the current PoP Node to make sure the line of sight as needed and attaches Ethernet/PoE cable(s) to connect to cnMaestro.
-
If current POP is configured with a management VLAN, then you will temporarily need to change the directly connected Switchport VLAN configuration to allow for remote access once the new node is installed. This is required due to the default config of the new node not having any Management VLAN configured, and therefore it will only be remotely accessible via untagged IPv6 address ([fe80::204:56ff:fexx:xxxx]) or untagged IPv4 address (169.254.1.1).
-
Remotely access new node via its web GUI. Enabled the Onboard E2E controller and fill out ONLY the cnMaestro information in the bottom part of the pop-up window.
-
Once the E2E controller is enabled, go to the Configuration/Node settings and configure the new node’s IPv4 address using the exact same network IP settings that were being used by the current PoP Node. Also configure the DNS Server information in the Configuration/Network tab.
-
Check the cnMaestro Connection status and ensure it is now showing “Waiting for Approval” status. You may need to toggle the “Remote Management” Enable/Disable button on the replacement radio node to restart/speed up the cnMaestro connection process.
-
DO NOT APPROVE/ONBOARD THE NEWLY DETECDTED REPLACEMENT E2E NETWORK INTO CNMAESTRO UNTIL AFTER PERFORMING THE FOLLOWING STEPS!! Failure to follow this will result in a failed E2E restoration.
-
Delete the original E2E network from cnMaestro (1st step is to click on the failed E2E network, then Inventory, then delete all the listed cnWave nodes …. 2nd step is to delete the PoP Node of the network…. 3rd step is to delete the E2E Network itself if not deleted part of the second step)
-
Onboard the new (replacement) E2E into cnMaestro. Configure the name of the new E2E Network the same as the original/old E2E Network. (The original E2E Network name is not stored as part of the E2E backup configuration file).
-
Restore the E2E backup configuration file downloaded in the 1st step onto the newly onboarded E2E Network (the POP node will take the configuration and reboot when you do this)
-
While new POP node is rebooting, restore switch VLAN interface to its original configuration (since the POP node will now have a configured Management VLAN once it reboots with the restored E2E configuration file)
-
The full cnWave network should now be operational and visible via cnMaestro with a new PoP Node running the Onboard E2E Controller.
-
Once we confirm that the new E2E Network is functioning as expected, we will have to ask the local installer to physically remove or adjust the old PoP node to make sure there is no interference to the current topology and links.