Learn how to configure VPN server and client settings for the NSE 3000 with this easy step-by-step guide. Instructions include Windows, Linux, MacOS, iOS/iPadOS and Android environments.
VPN Server Configuration from cnMaestro
-
From the configuration menu, select VPN and RADIUS Server.
-
Select Enable inbuilt VPN Server option and enter the details for VPN Server. Make sure to select Enable 2FA if two-factor authentication is required.
-
Select Enable inbuilt RADIUS Server option and then click add new to add a RADIUS User.
-
Save the configuration.
-
If you have enabled 2FA, install Google Authenticator app in your phone.
-
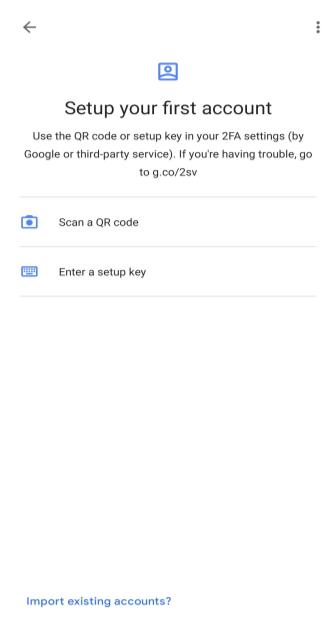
Open the Authenticator app.
-
Select Scan a QR code option.
-
On cnMaestro, click the QR code icon for the RADIUS user you have added. You will also receive the same QR code on the user email ID provided.

-
Scan the QR code.
-
An Account will be added on your authenticator app with a 6-digit code which changes periodically.
-
Make sure to add this 6-digit code along with your VPN Password. The code should be added after the VPN Password you have set.
If your VPN Password is
xxxxxxxxand the code shown in the app isyyyyyy, the new Password
isxxxxxxxxyyyyyy.
-


Windows
Registry Change
Open the Command Prompt as Administrator. Run the following command (that should be all on one line):
REG ADD HKLM\SYSTEM\CurrentControlSet\Services\PolicyAgent /v AssumeUDPEncapsulationContextOnSendRule /t REG_DWORD /d 0x2 /f

Reboot your device once the registry changes are completed.
VPN Profile Configuration
-
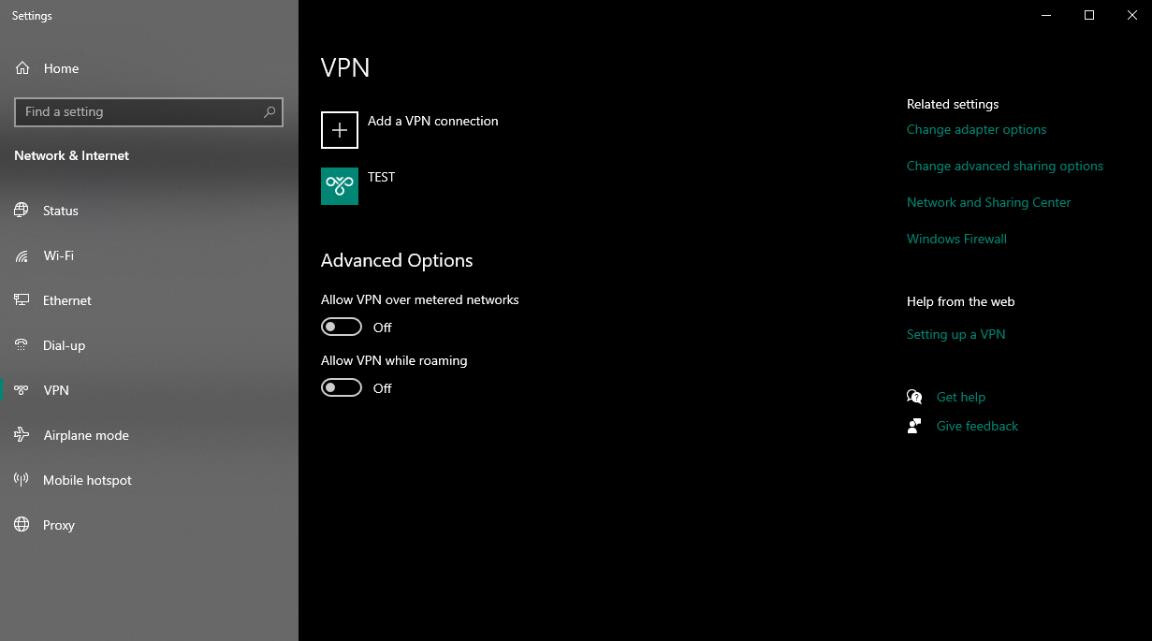
Go to Settings → Network & Internet → VPN.
-
Click Add a VPN connection.
-
Choose Windows (built-in) option from drop down menu for VPN provider.
-
Enter a Connection name of your choice.
-
Enter your VPN Server IP in the Server name or address field.
-
Select L2TP/IPsec with pre-shared key in the VPN type drop-down menu.
-
Enter your VPN IPsec PSK in the Pre-shared key field.
-
Select User name and Password option in Type of sign-in info drop-down menu.
-
Enter your VPN Username in the User name field.
-
Enter your VPN Password in the Password field.
-
Click the Save button.
-
A new VPN connection has been added.


Adapter Settings
-
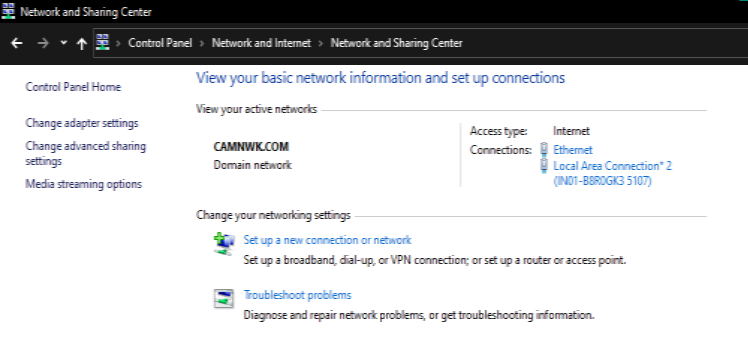
Go to Control Panel → Network and Internet → Network and Sharing Center.
-
Select Change adapter settings from the side menu.
-
Right click on your VPN Connection and Select Properties.
-
Click Allow these protocols and select Unencrypted password (PAP).

-
Select OK.

Connecting to the VPN
-
Go to Settings → Network & Internet → VPN.
-
Select your VPN connection and click Connect.
-
Your device has been successfully connected to VPN.

Ubuntu Linux
Ubuntu 18.04 (and newer) users can install the network-manager-l2tp-gnome package using apt, then configure the IPsec/L2TP VPN client using the GUI.
Run the following command in the terminal.
sudo apt-get install network-manager-l2tp-gnome
-
Go to Settings → Network → VPN. Click the + button.
-
Select Layer 2 Tunneling Protocol (L2TP).
-
Enter the VPN Name in the Name field.
-
Enter Your VPN Server IP for the Gateway.
-
Enter Your VPN Username for the User name.
-
Enter Your VPN Password for the Password.
-
Click the IPsec Settings… button.
-
Check the Enable IPsec tunnel to L2TP host checkbox.
-
Leave the Gateway ID field blank.
-
Enter Your VPN IPsec PSK for the Pre-shared key.
-
Expand the Advanced section.
-
Enter aes128-sha1-modp2048 for the Phase1 Algorithms.
-
Enter aes128-sha1 for the Phase2 Algorithms.
-
Click Apply.
-
Click OK, then click Add to save the VPN connection information.
-
Turn the VPN switch ON.


MacOS
-
Open System Preferences and go to the Network section.
-
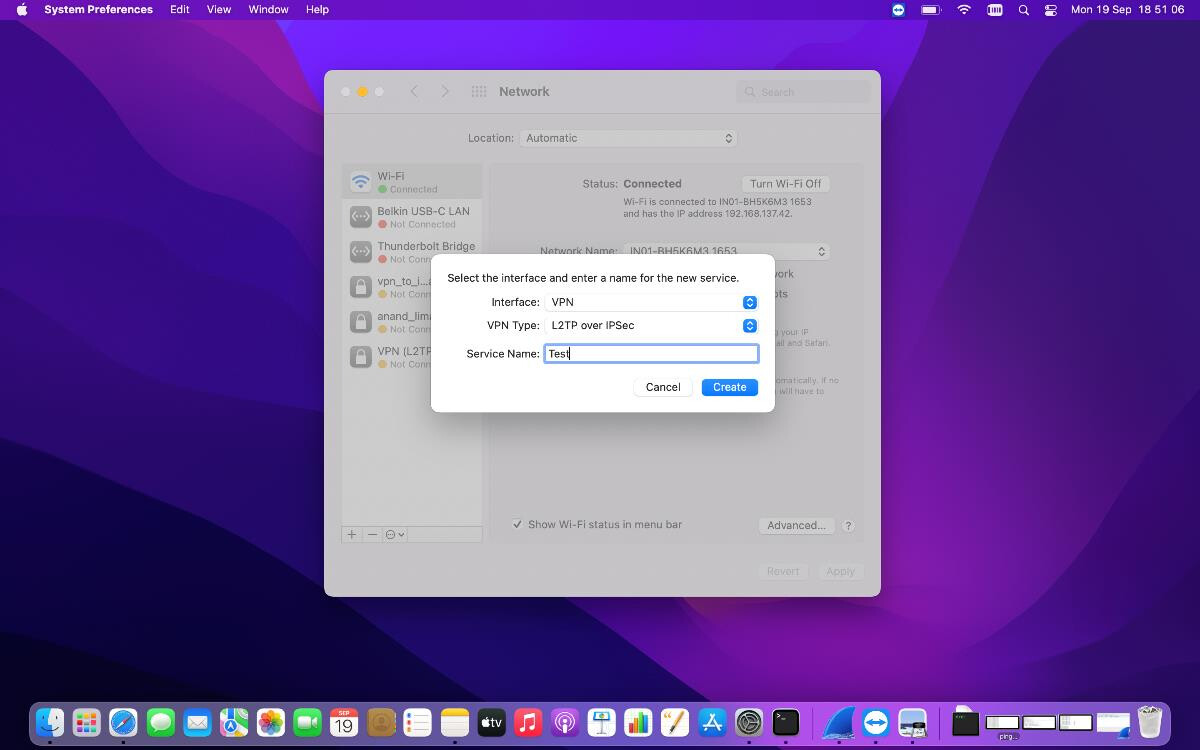
Click the + button in the lower-left corner of the window.
-
Select VPN from the Interface drop-down menu.
-
Select L2TP over IPSec from the VPN Type drop-down menu.
-
Enter name of the VPN in the Service Name field.
-
Click Create.
-
Enter Your VPN Server IP for the Server Address.
-
Enter Your VPN Username for the Account Name.
-
Click the Authentication Settings button.
-
In the User Authentication section, select the Password radio button and enter Your VPN Password.
-
In the Machine Authentication section, select the Shared Secret radio button and enter Your VPN IPsec PSK.
-
Click OK.
-
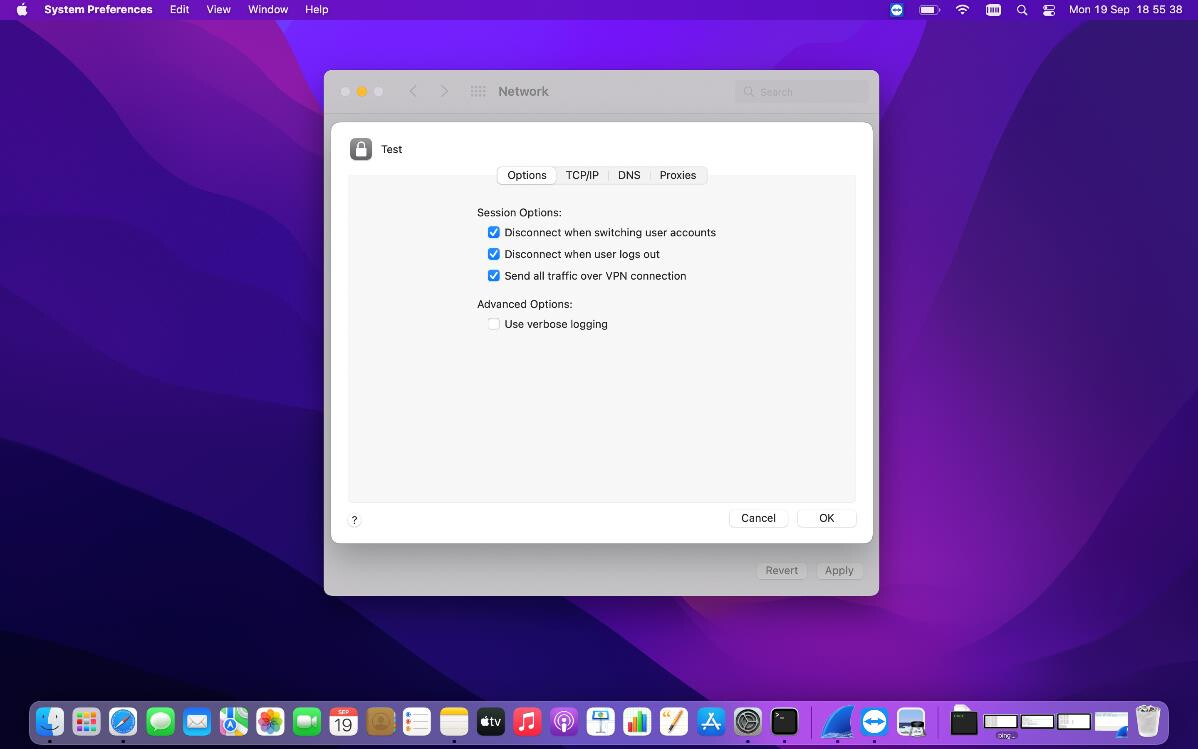
Check the Show VPN status in menu bar checkbox.
-
Click the Advanced button and make sure the Send all traffic over VPN connection checkbox is checked.
-
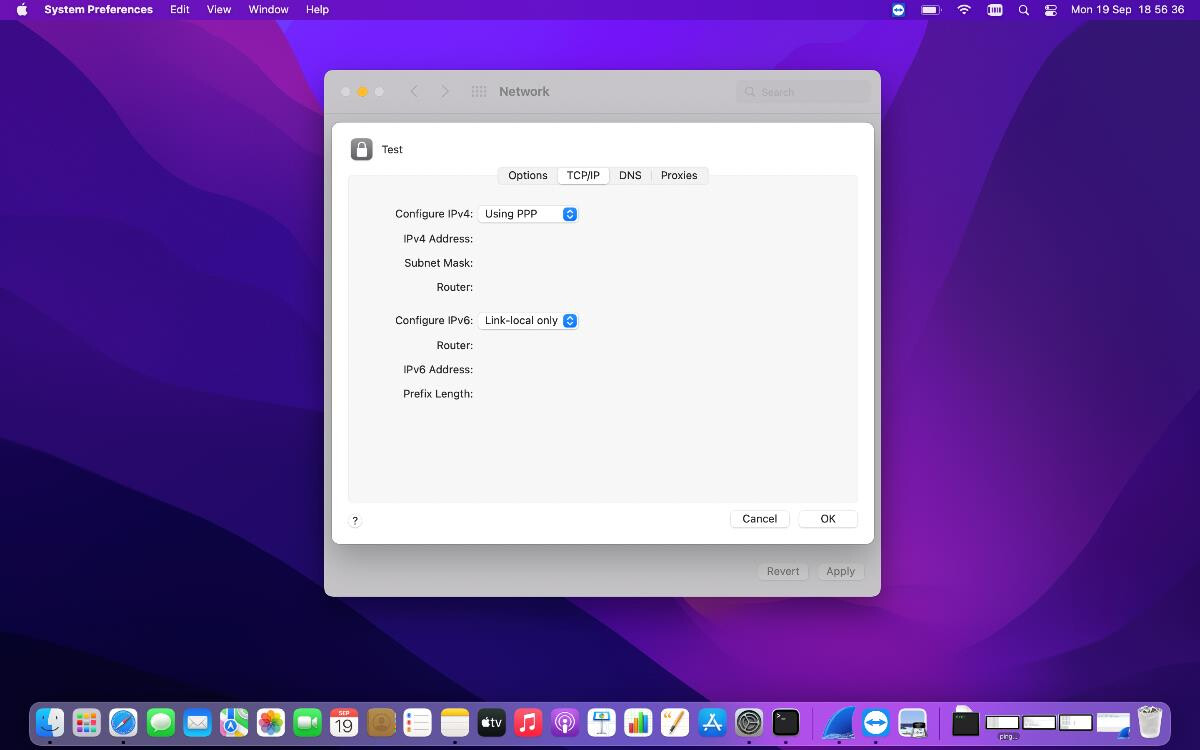
Click the TCP/IP tab, and make sure Link-local only is selected in the Configure IPv6 section.
-
Click OK to close the Advanced settings, and then click Apply to save the VPN connection information.
-
Click connect.
-
The VPN has been connected.


iOS/ iPadOS
-
Go to Settings → General → VPN.
-
Tap Add VPN Configuration…
-
Click Type and Select L2TP.
-
Enter the Description of your choice.
-
Tap Server and enter Your VPN Server IP.
-
Tap Account and enter Your VPN Username.
-
Tap Password and enter Your VPN Password.
-
Tap Secret and enter Your VPN IPsec PSK.
-
Set the Send All Traffic switch to ON.
-
Tap Done.
-
Turn ON the VPN.
-
The VPN has been connected.


Android
-
Open Settings.
-
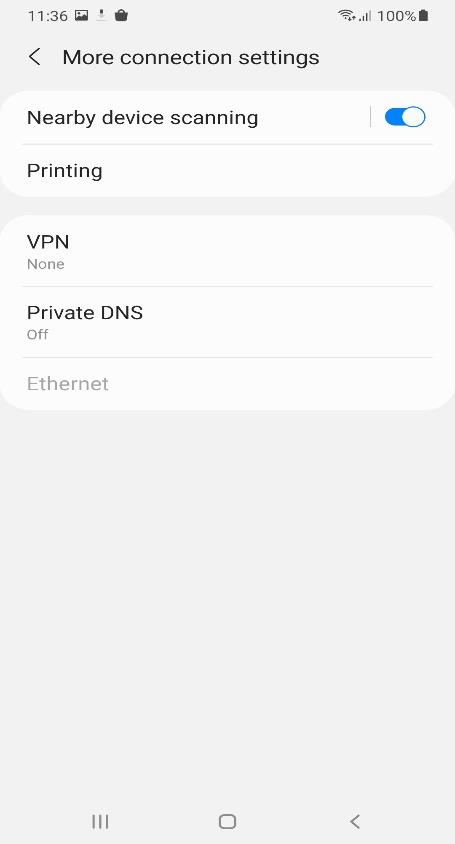
Navigate to VPN.
VPN settings location may vary depending on device manufacturer. The device represented here is a Samsung device.
-
Tap : icon at top-right of screen.
-
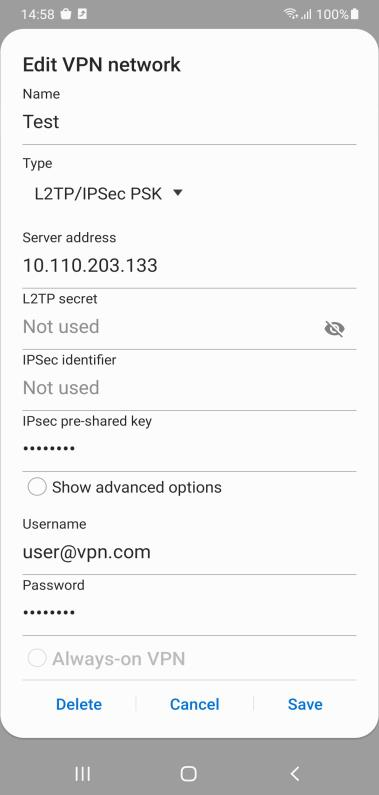
Enter the name of the VPN in the Name field.
-
Select L2TP/IPSec PSK in the Type drop-down menu.
-
Enter Your VPN Server IP in the Server address field.
-
Enter Your VPN IPsec PSK in the IPSec pre-shared key field.
-
Enter Your VPN Username in the Username field.
-
Enter Your VPN Password in the Password field.
-
Tap Save.
-
A new VPN profile has been added.
-
Click the VPN profile that has been created.
-
Check the Save account information checkbox.
-
Click Connect.
-
The VPN has been connected.


VPN_2FA_Configuration_Guide.pdf (1.5 MB)